Gearheads everywhere can relate to mating season. That's when you're building a kit car, custom classic truck, musclecar, street rod, or racecar from the ground up, and you put the new engine and transmission together, place it in the chassis, and install the body on the chassis for the first time ever. Sure, you're bound to encounter some mishaps. Perhaps you procured the incorrect clutch alignment tool from the neighborhood auto parts store. Or maybe you had to search several different auto supply houses for an engine leveler that would work with your Hilborn EFI setup and Summit Racing engine hoist back in your garage. Circumstances like these are common when working on your enthusiast automobile.
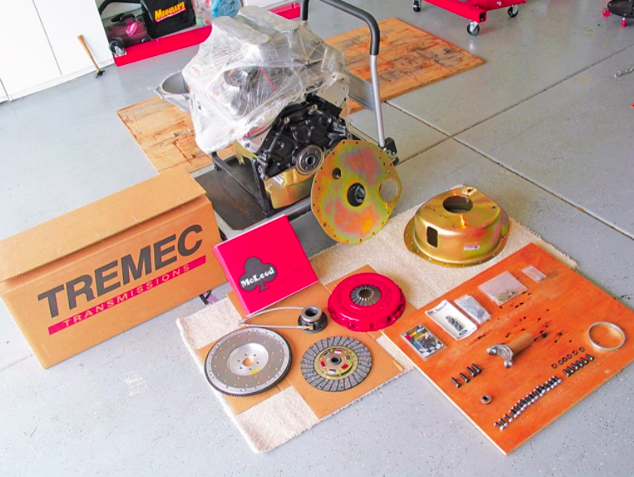
The Hilborn EFI-topped Smeding Performance 427ci V8 stroker mill, McLeod dust shield, clutch, pressure plate, scattershield, hydraulic throwout bearing, Tremec TKO600 five-speed manual transmission, and Grade 8 fasteners await assembly. Read on to find out how we did it.
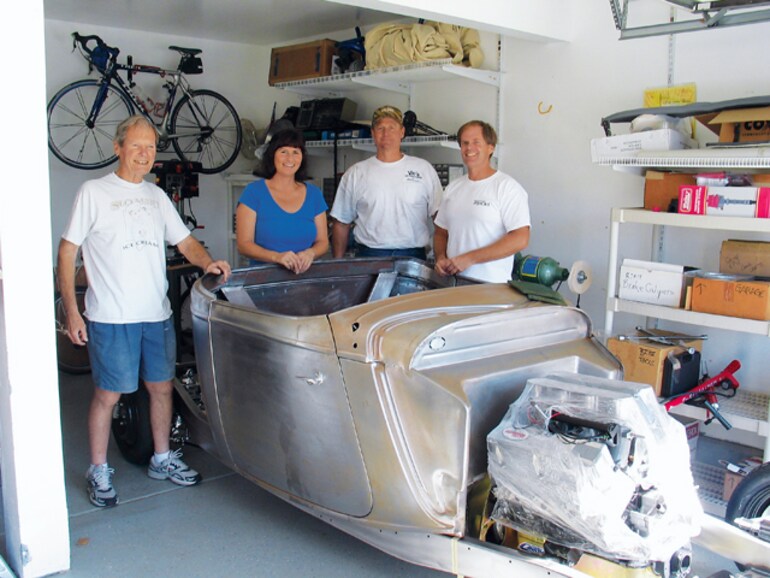
KIT CAR's editor and his dad have a half-finished project truck they began when said editor was the feature editor on sister publication Custom Classic Trucks. The truck consists of an all-new Steve's Auto Restorations custom-fabricated steel 1933/'34 Ford roadster pickup body, an SAC Hot Rod Products fully boxed and custom '33/'34 chassis, a Smeding Performance 427 stroker engine from a Ford 351 Windsor block topped with Hilborn EFI, a Tremec TKO600 five-speed manual transmission, McLeod components to mate the engine with the trans, and fasteners from ARP and Dark Horse Performance.
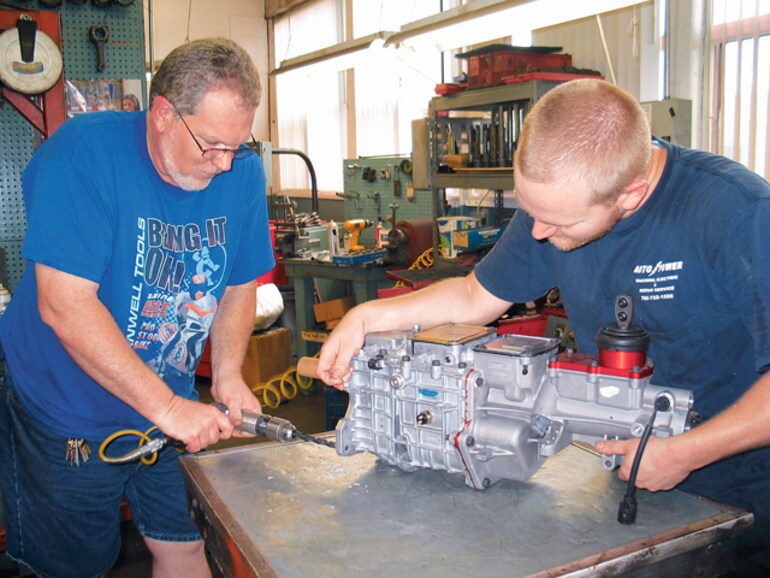
According to the McLeod scattershield instructions, we needed to enlarge the holes in the Tremec transmission case from 7/16-inch to a more stout 1/2". The cordless drill in our garage didn't have the torque to do the job, so we sought help from the experts: Auto Power Machine, Electric & Repair Service, in Oceanside, CA. Keith Stover drove out the four holes, while Kevin Payne held the transmission steady.
When we were confident we had accumulated all the components to begin putting the DreamSmith Drop Top Truck together, we contacted some old mates for help, both family and friends, and went to work. Given the pickup's high-performance construction-all-independent Kugel Komponents suspension, 555-horsepower/557 lb-ft 427ci Smeding Performance engine, and Tremec TKO600 five-speed manual transmission-the DreamSmith truck's theme is prehistoric Cobra roadster pickup. Watch over our shoulders in the Smith garage and witness the Ford coming together.
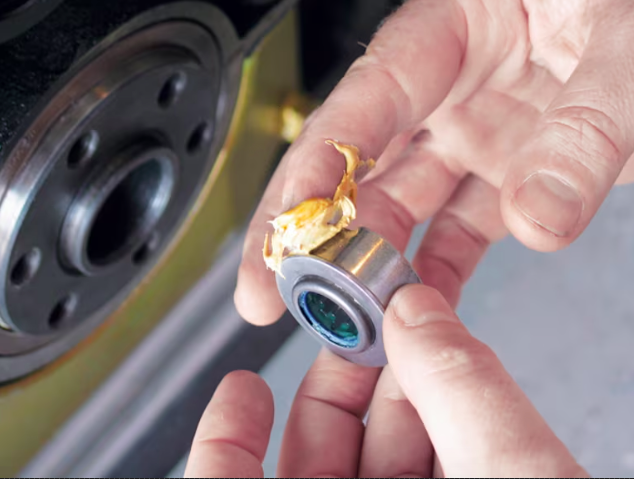
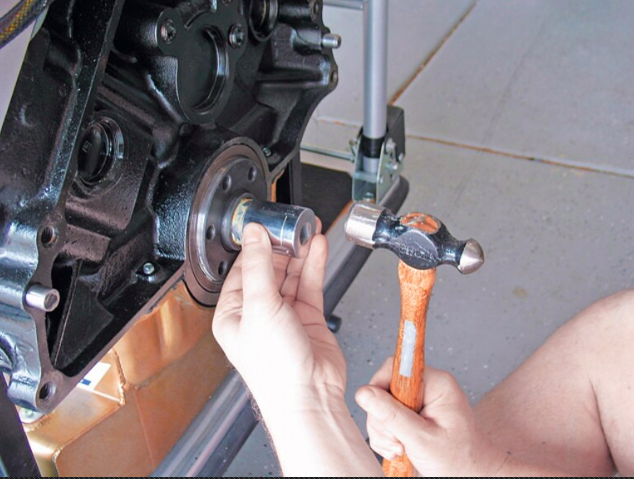
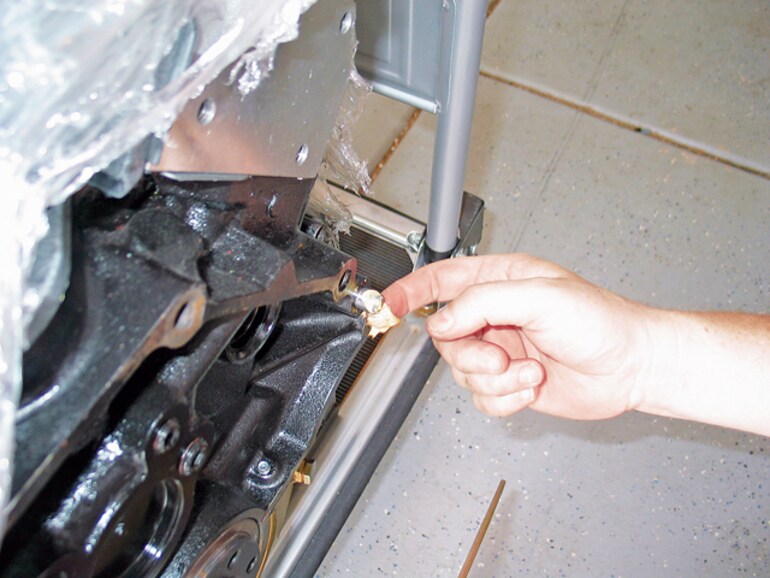
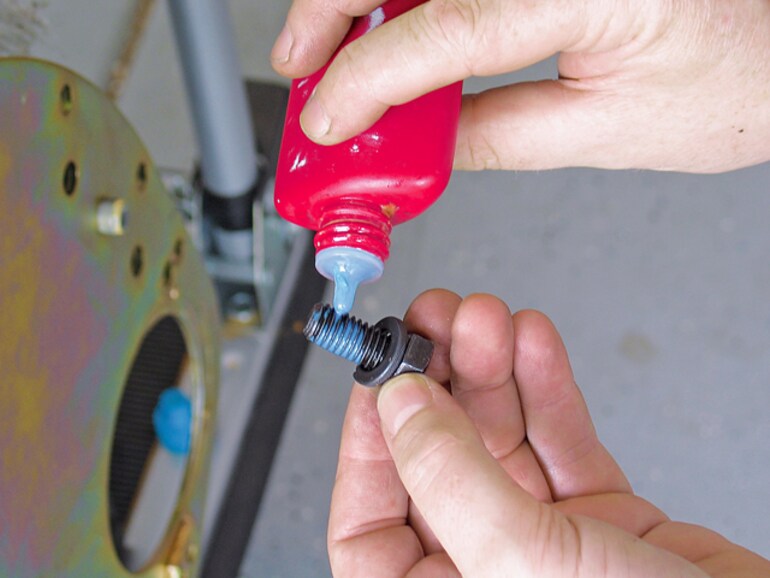
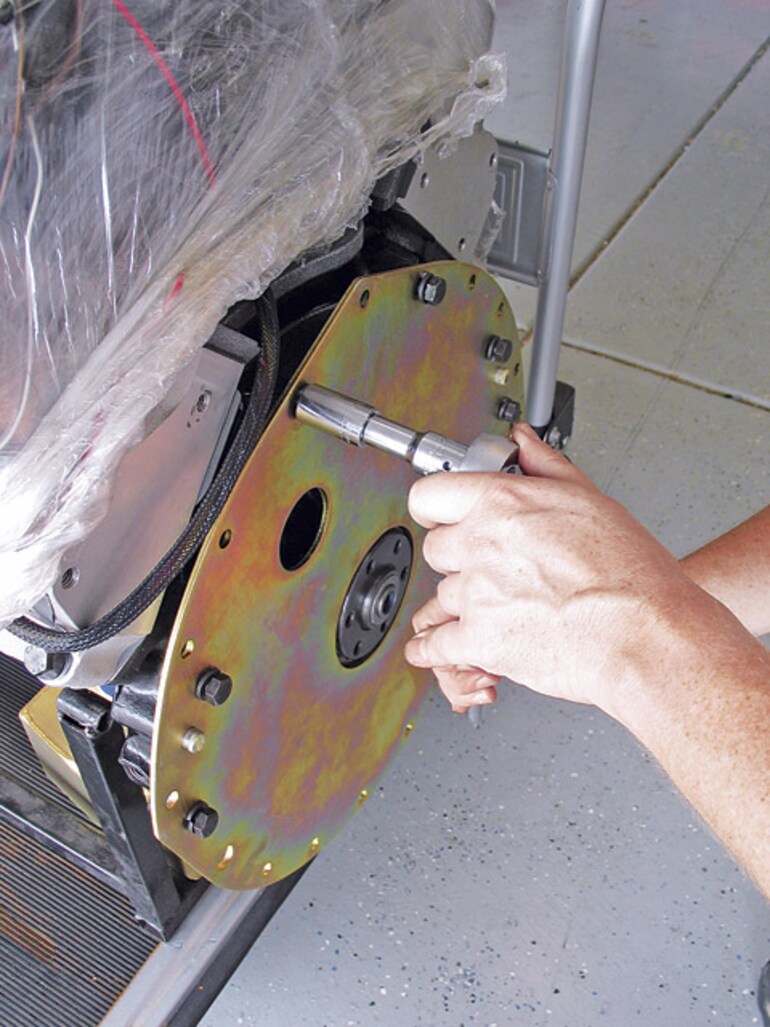
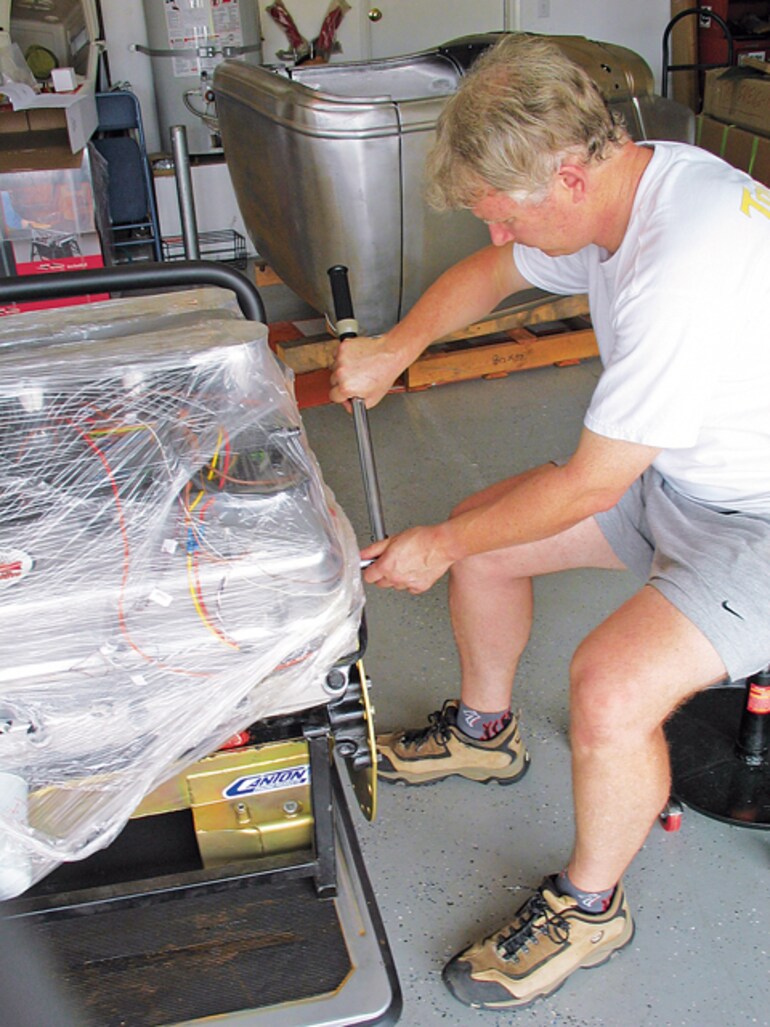
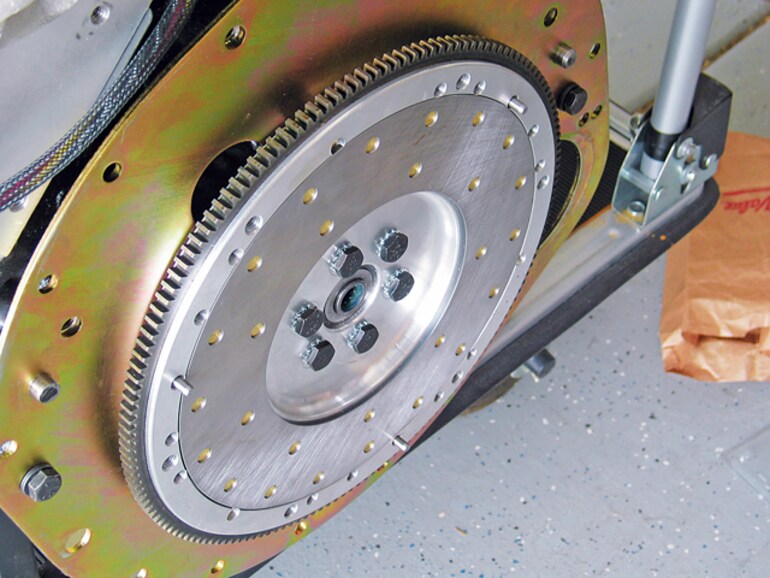
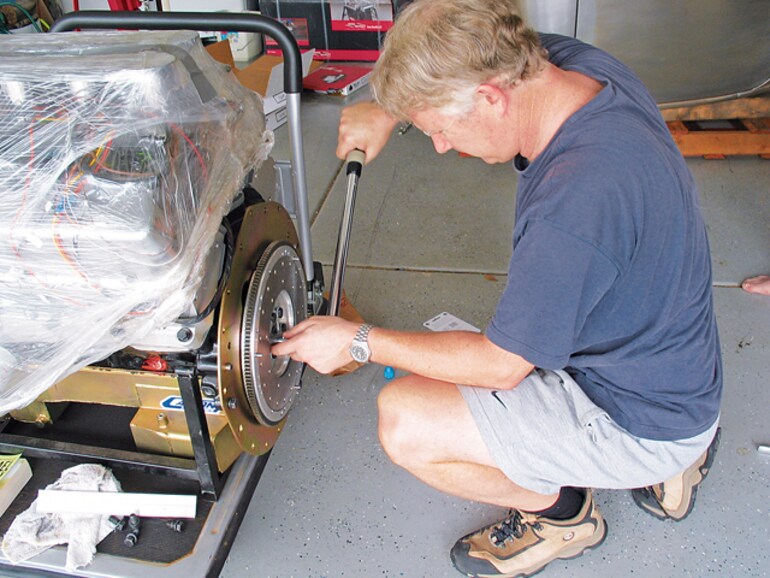
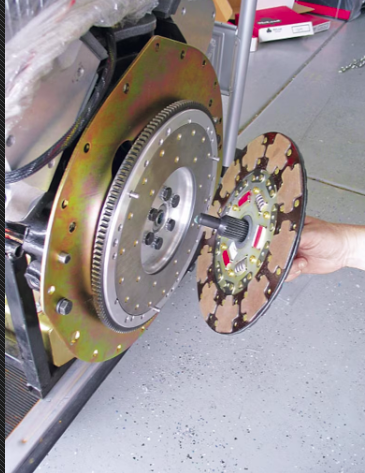
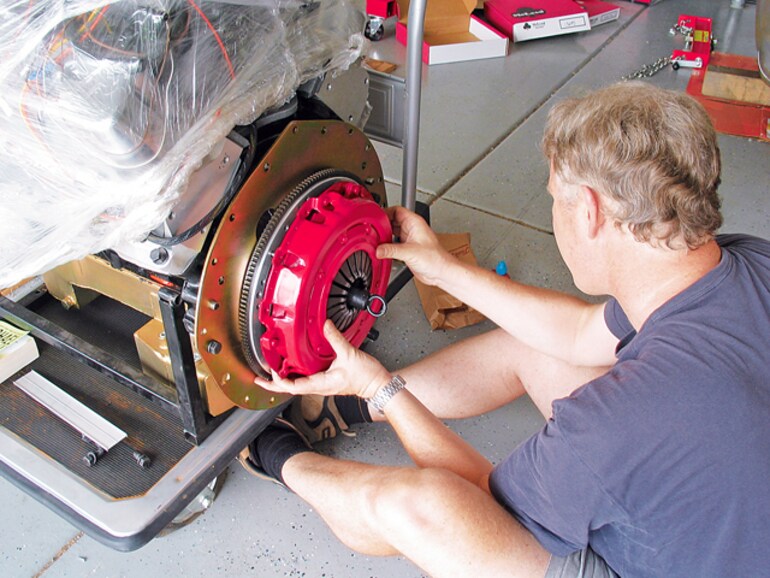
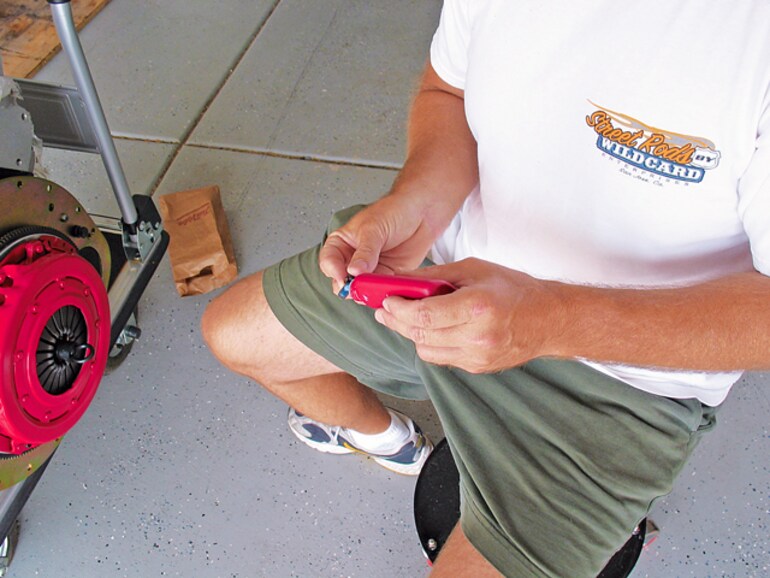
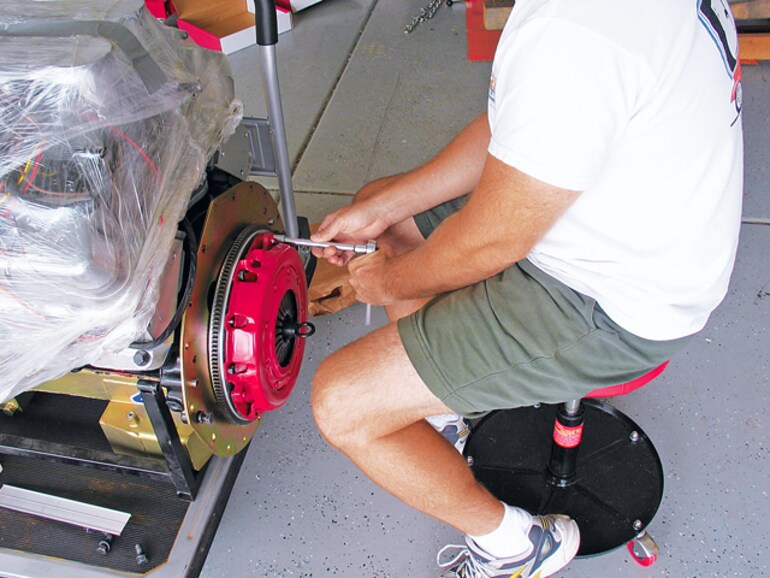
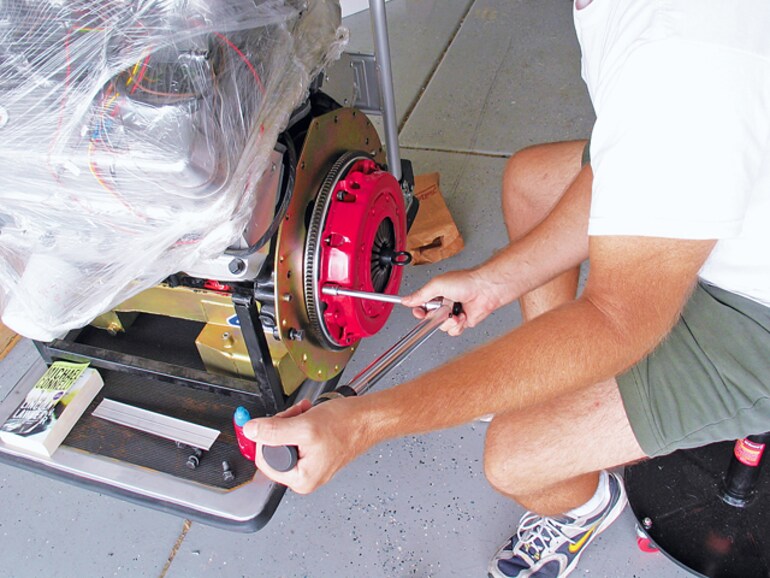
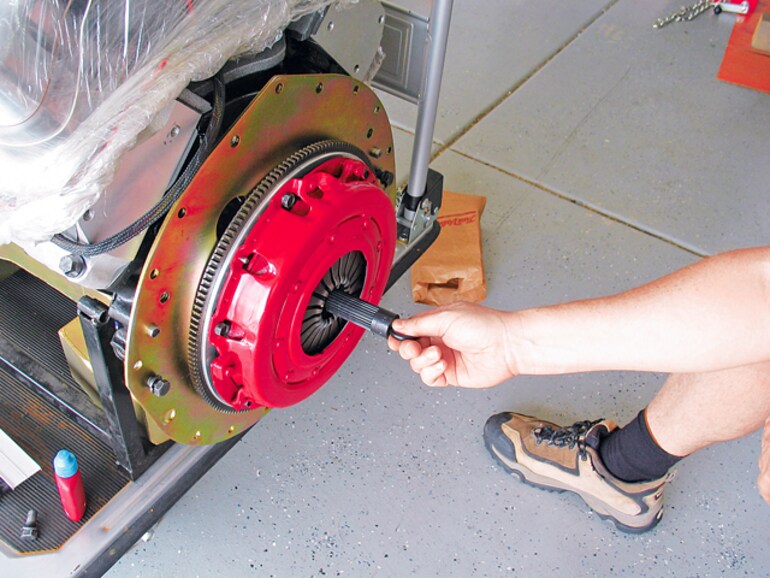
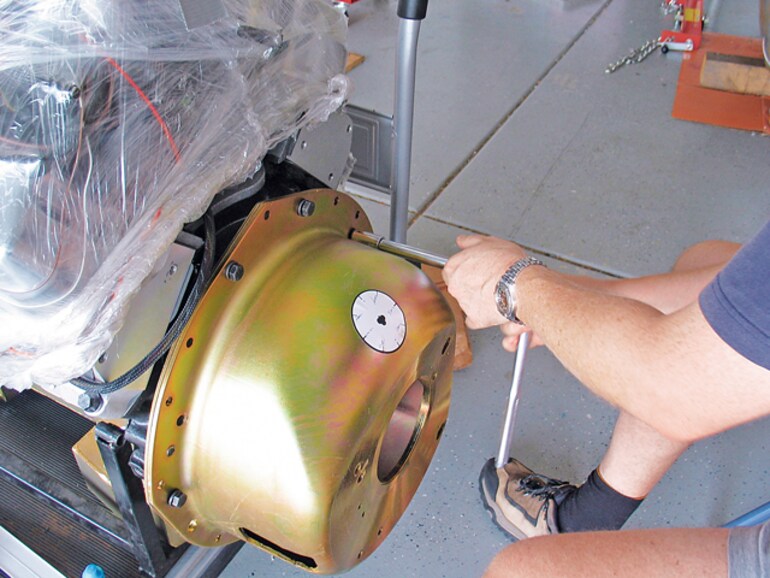
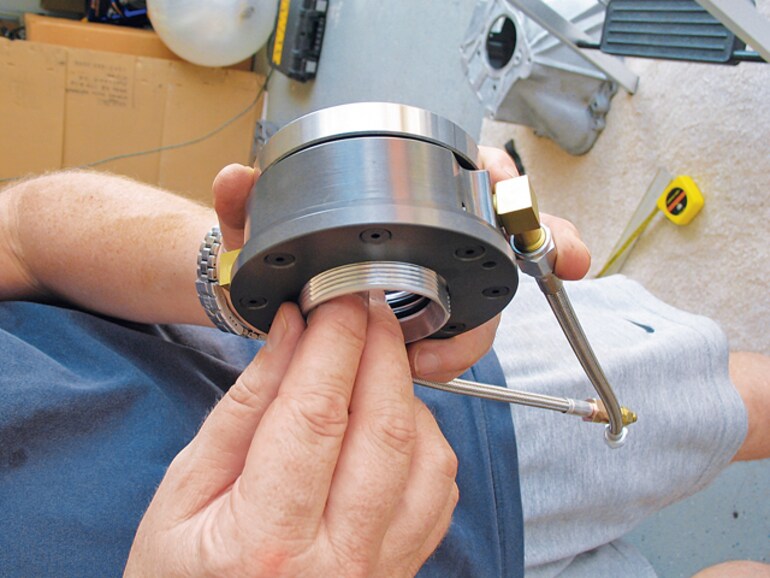
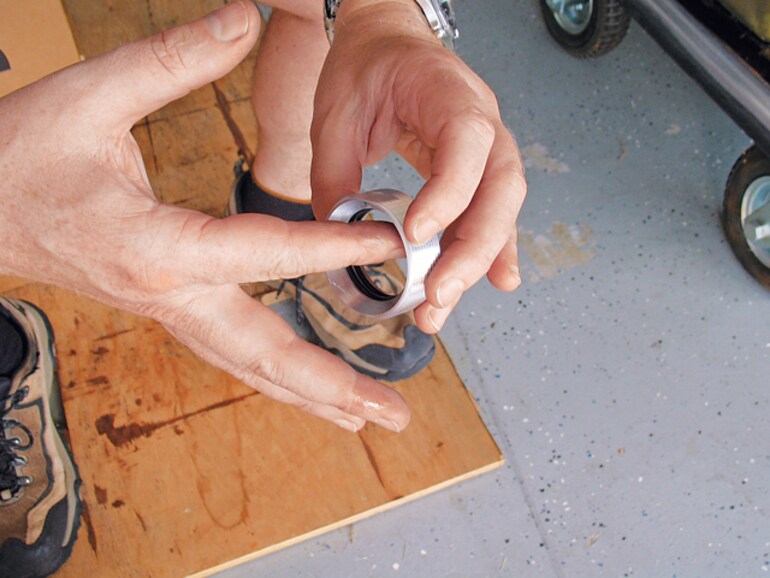
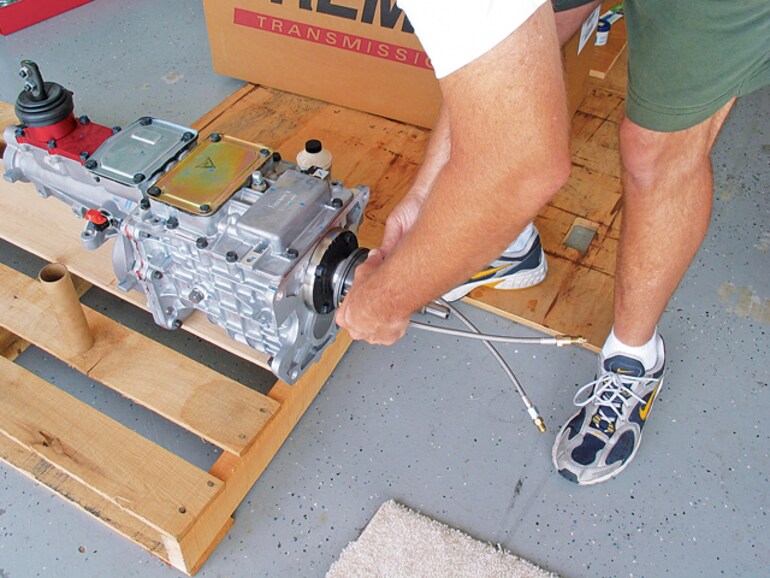
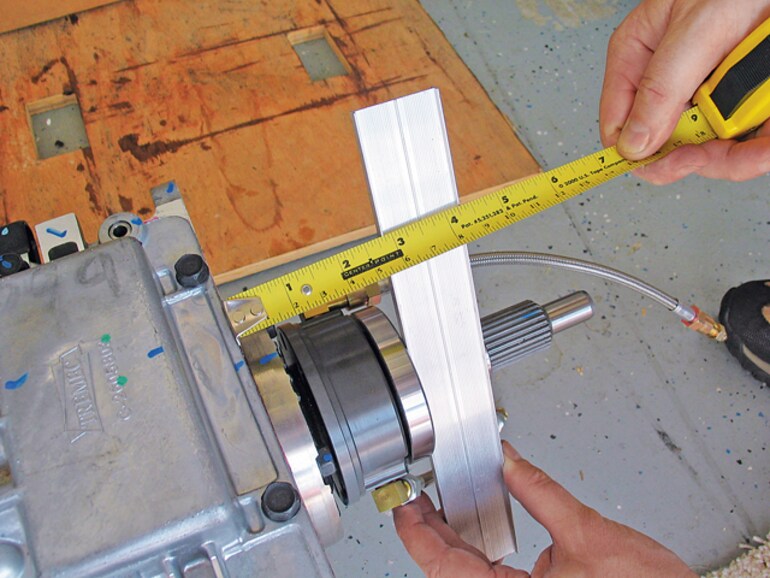
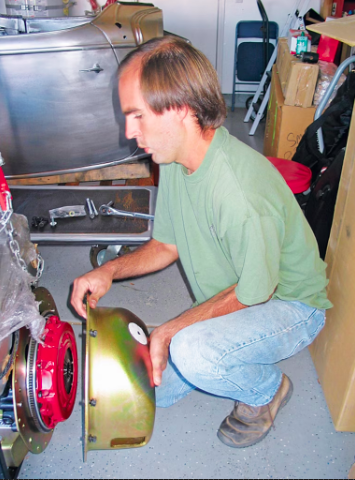
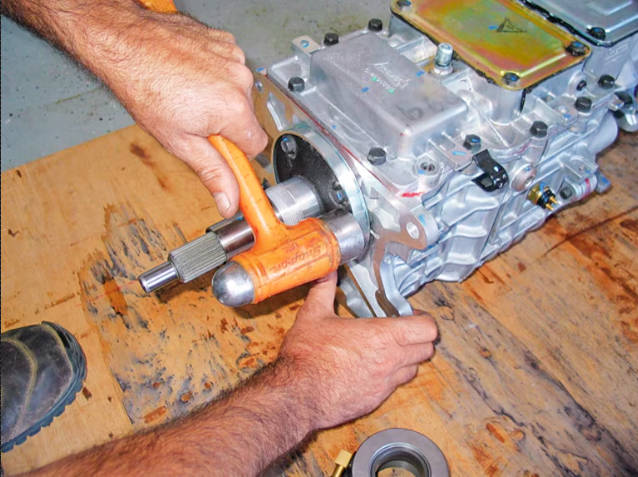
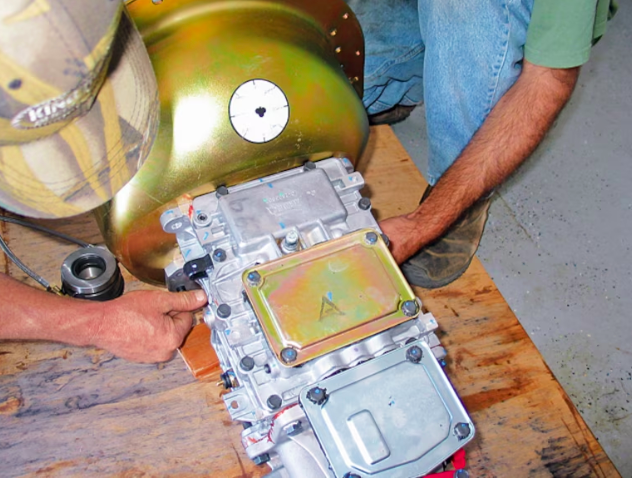
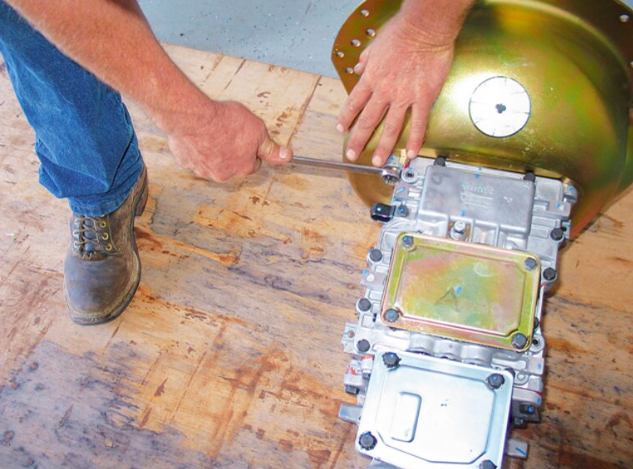
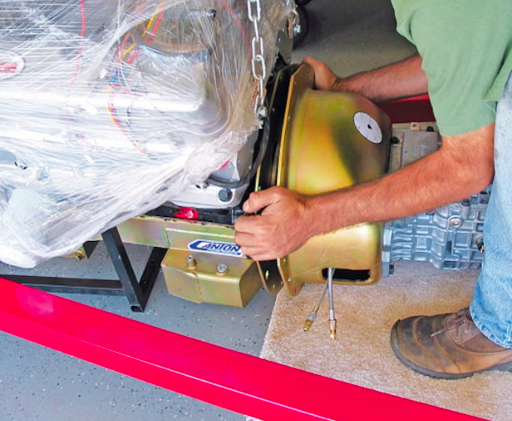
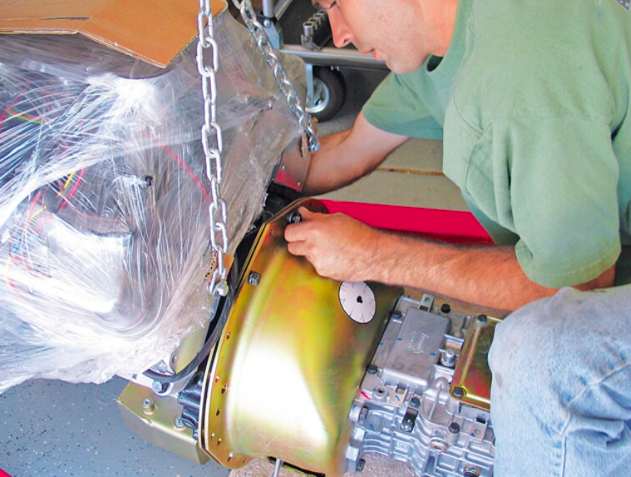
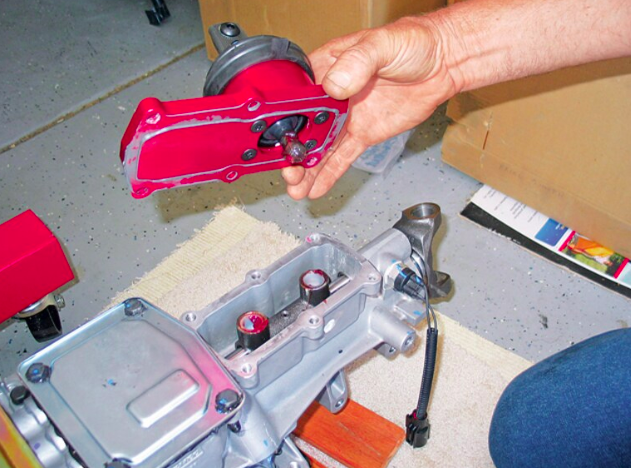
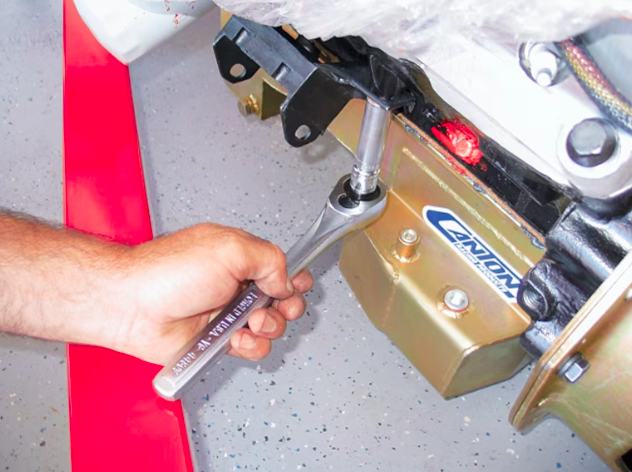
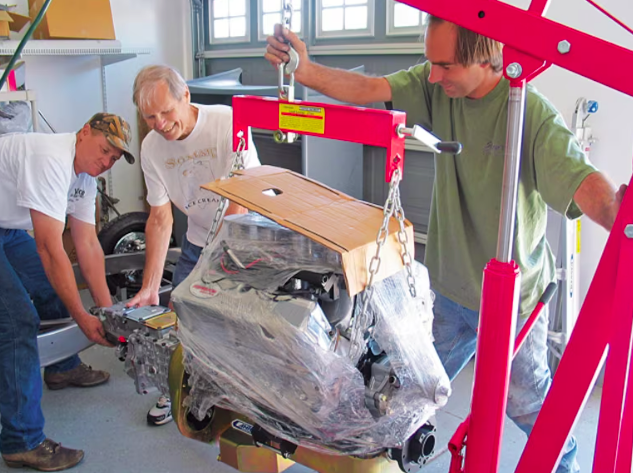
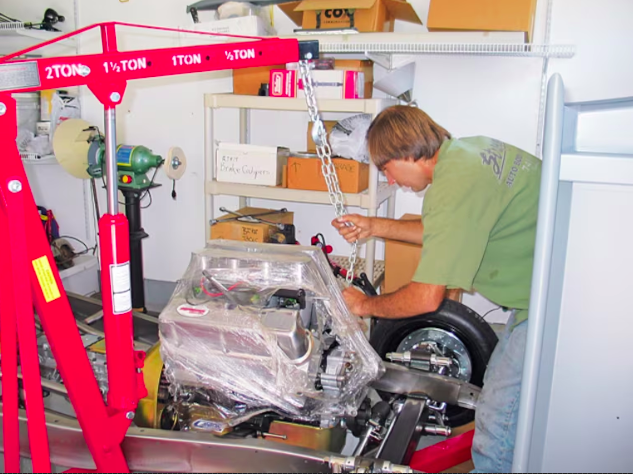
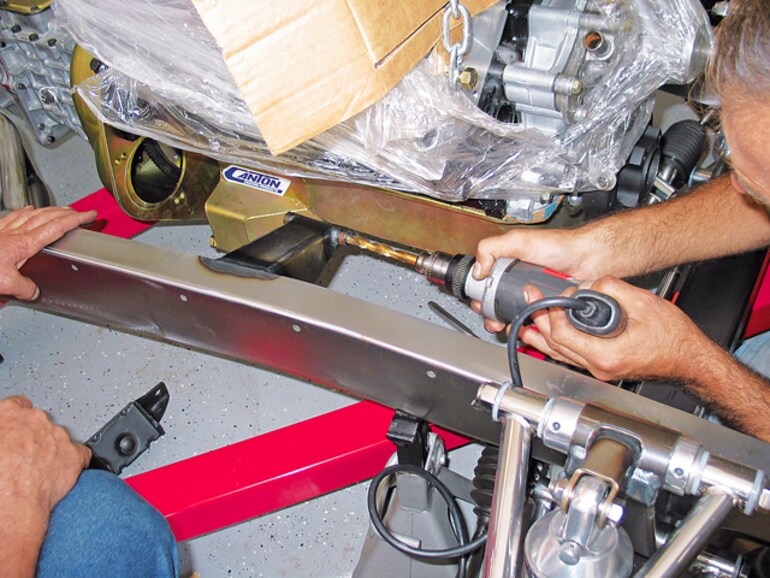
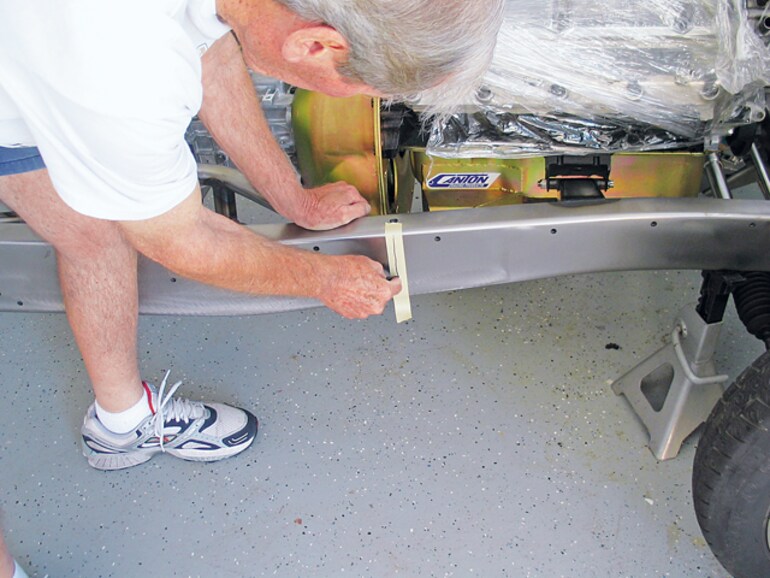
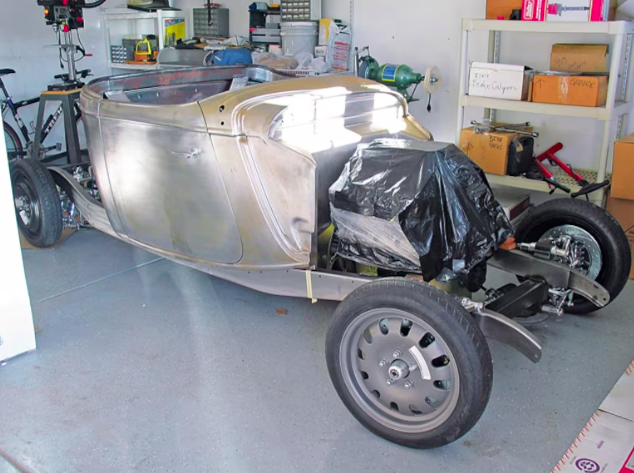
One of my good mates from Down Under (New Zealand), Mark Williamson, greased the pilot bearing.Without a proper bearing press tool, we used the appropriate-sized socket (1-1/8") and gently pressed (tapped) the Dark Horse Performance Ford Racing pilot bearing into the crankshaft opening in the back of the engine.In order to slide the McLeod heavy-duty engine dust plate into position on the back of the Smeding Performance 427 stroker engine with ease, Mark put grease on the dowel pins as per the McLeod scattershield installation instructions.Before fastener the lock washer-clad Grade 8 bolts, the Kiwi liberally applied Loctite to the threads. Better safe than sorry gearheads!With all the dust shield bolts loosely in place, Mark tightened them down with the socket wrench.An avid amateur Kiwi rally driver and accomplished mechanic, Mark utilized the trusty Craftsman torque wrench to torque the dust shield bolts to the specified 25-lb.-ft. of torque.After applying Loctite to the six Grade 8 flywheel bolts, the flywheel, with its three dowels in place, was attached to the back of the V8 engine.Utilizing the torque wrench, Mark torqued the star washer and Loctite thread-clad Grade 8 bolts to the specified torque spec.The high performance McLeod clutch awaits installation after the 26-spline clutch alignment tool was inserted.Notice the clutch alignment tool is firmly stabilizing the clutch as the Kiwi attaches the clutch pressure plate onto the flywheel dowel pins.Mark photographed the author applying Loctite to the bolts that hold the 10.5-inch pressure plate prior to installation.I first fastened the pressure plate bolts with my trusty socket wrench.Smith muscle's not even required when torquing the bolts to the specified 25-lb.-ft.Before installing the McLeod scattershield, Mark removed the clutch alignment tool.In order to take measurements of the McLeod hydraulic throwout bearing on the Tremec TKO600's input shaft, Mark tightened the McLeod bellhouse to fit flush against the dust shield. Mark took the measurement of the clutch fingers to the bellhouse as per the McLeod instructions. The tale of the tape was 3.75 inches.The hydraulic throwout bearing has an adjustment screw or sleeve, which the Kiwi removed as per McLeod's instructions.As indicated in the instructions, DOT 3 brake fluid was applied on the adjustment sleeve to lubricate the sleeve's O-rings.With the tapered edge towards the transmission's base, Mark slid the hydraulic throwout bearing's adjustment sleeve on the trans input shaft.Being careful not to cross thread, I screwed the McLeod hydraulic throwout bearing onto the aluminum adjustment sleeve.Taking the measurement from the front of the transmission to the front of the hydraulic throwout bearing, we arrived at 2-13/16 inches. Subtracting this measurement (2-13/16 inches = 2.812 inches) from the clutch fingers to the bellhouse face measurement (3.75 inches or 3-12/16 inches = 3.75 inches) yielded 15/16 of an inch (.938), or not quite an inch. According to the instructions, the throwout bearing position was out of tolerance. We needed a spacer. The tolerance needed to be within .100 to .300 of an inch. Alas, Mark had to return to New Zealand. We obtained a .700-inch spacer from McLeod, installed it in front of the front of the clutch release bearing (hydraulic throwout bearing), and were within tolerance (.238-inch). Another buddy, Ben, Ford mechanic for more than 12 years, confirmed the measurement.Ben and my cousin Kenny talked Dad and me into utilizing a steel flywheel as opposed to an aluminum flywheel. They explained that steel would provide much better drivability in such a lightweight truck that has such a high performance V8 engine. Ben removed the bellhouse. By using the steel flywheel that the engine builder balanced and dyno'ed the engine with, Ben and Ken redid the work Mark and I had done.Prior to bolting the McLeod scattershield onto the back of the engine, Ben tapped the appropriate-sized McLeod spacer ring onto the Tremec TKO600 input shaft housing.Ken and Ben attached the bellhouse to the transmission.With a 1/2-inch hand wrench, Kenny tightened the four Grade 8 transmission nuts to the bellhouse bolts.Ken held the Smeding Performance 427 stroker engine in the air with the 2-ton engine hoist, while Ben eased the TKO600 trans 26-spline input shaft into the clutch opening. Thanks to the clutch alignment tool, the input shaft went in with just a bit of persuasion.Ben installed the Grade 8 bellhouse to the engine bolts with the lock washers on, so as not to lose the washers. He didn't use Loctite since we'll be taking the engine/trans back apart several more times before final installation. To prevent interference with Steve's Auto Restorations '33/'34 roadster pickup body's trans tunnel,Kenny removed the Tremec shifter and taped up the opening with Duct tape.Builder and off road racer of 1st generation Broncos (for Mickey Thompson Racing back in the day), Kenny knows his way around Ford V8 engines. He fastened the engine mounts onto its sides.While Ben drove the 2-ton engine hoist into position, my Dad and my cousin Kenny guided the engine/transmission toward its new home. We're so excited about this that the four of us can't keep from smiling!Kenny and Dad guided the Tremec TKO600 tailshaft underneath the custom tubular crossmember.Notice the engine mount to chassis bolt that's sticking out on the passenger side? Ben realized that we'd need to bore out the chassis mount holes a tad to fit the ARP stainless steel chassis mount fasteners.With the engine/trans held by the engine hoist, Ben bored the holes out on the chassis mounts with an electric corded drill.To the right of my father, you can see the engine-to-frame mount bolts are now in place. Using the front mount holes as a reference point, Dad used masking tape and a magic marker to mark (show) where to position the roadster pickup cab body on the frame.The Steve's Auto Restorations all-steel roadster pickup body is so light (and Kenny and Ben are so strong) that they were able to lift the body and position it on the SAC Hot Rod Products '33/'34 Ford fully boxed custom chassis.From any perspective, the DreamSmith Roadster Pickup is becoming a reality. Stay tuned for more tech, how-to articles on this hot rod hauler on Monterey Car Week!